
A friend of mine who runs a coffee shop saw the drip bag cover generator I built and sent me one line.
"I think I need that too."
Every batch of beans has its own name, origin, roast level, flavor notes, and roast date. Every time the beans change, the cover has to be laid out all over again. When a customer wants a custom run for their company, a wedding, or an event, it's another full round of layout, proofreading, sizing, and sending to print.
A small shop doesn't have a design department.
The person doing the layout is usually the same person roasting the beans — and the one answering messages, shipping orders, and doing the books.
This is written for him, and for every small coffee shop with the same headache. I'll use that drip bag label generator as the example and walk through, step by step, how to build your own AI agent workflow, starting from installing the tools. At the end there's a prompt series you can paste straight to your agent — follow it, and you'll end up with a generator for your own brand.

The Result: Wide Living Cup's Drip Bag Cover Generator
Let's look at the finished product first — it's easier to picture the target that way.

This is the generator Wide Living Cup actually uses. For each batch of beans, you only fill in five pieces of information: bean name, roast level, flavor keywords, a sentence or two of description, and the roast date.
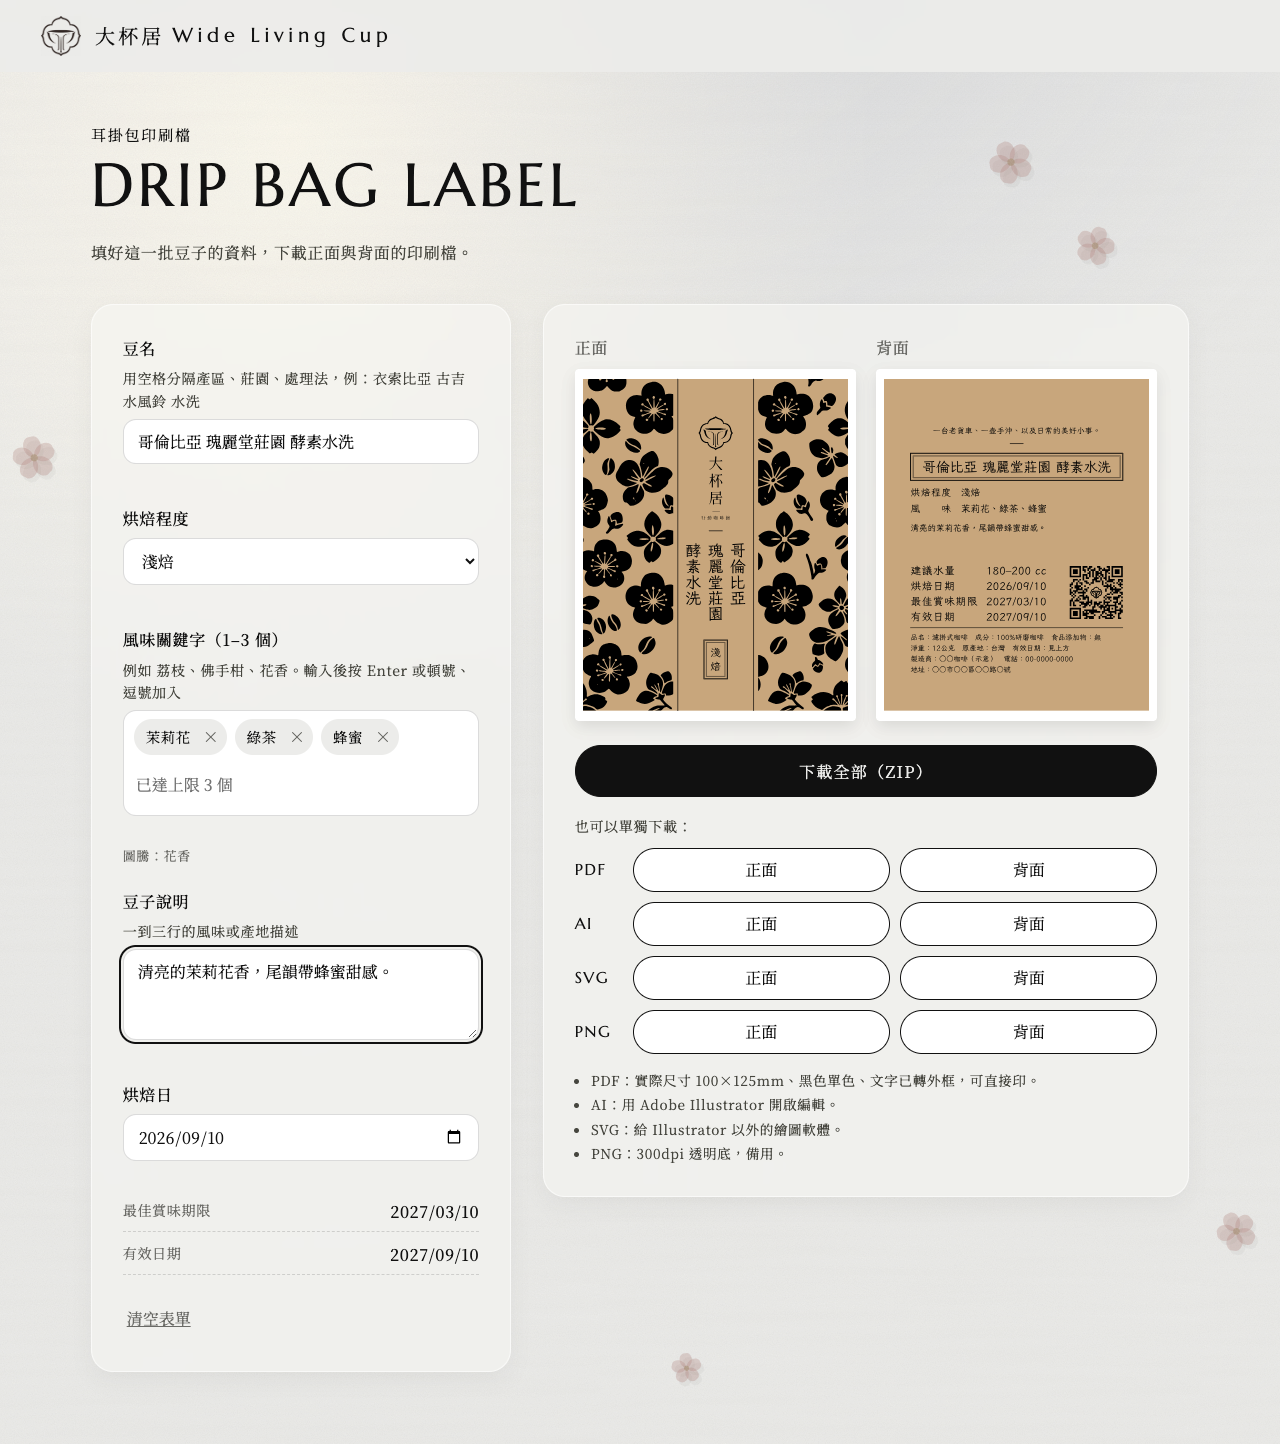
As soon as you fill it in, the preview on the right updates instantly. The front carries the brand and bean name; the back carries the flavor notes, description, best-by date, and regulatory fields.


A few deliberate choices went into the design:
- Brand and regulatory fields are locked. The brand tagline, the fine-print regulatory text, and the QR code are all hardcoded constants in the program. Whoever fills in the form can't touch them, so nobody accidentally changes the brand copy.
- Only the data that actually changes is open for editing. Bean name, roast level, flavor, description, and date differ from batch to batch, so those are the only fields left open.
- Dates calculate themselves. You only enter the roast date; the best-by and expiration dates are computed by the program.
- Flavor decides the pattern. The first flavor keyword maps to a set of batik-style patterns, so the cover's graphic changes along with the bean.
- Large, readable text. Since older customers read these bags too, the bean name, roast level, and date are set in the largest type sizes.
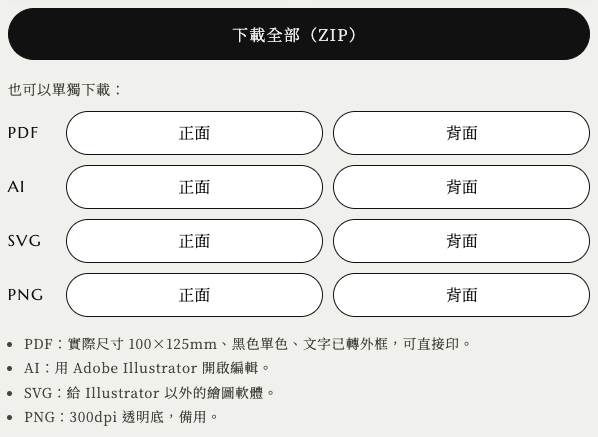
Hit export, and each side produces four formats — PDF, AI, SVG, PNG — packaged into a single ZIP. PDF is for printing, AI is for anyone used to Illustrator, and SVG and PNG are for other software or the web.
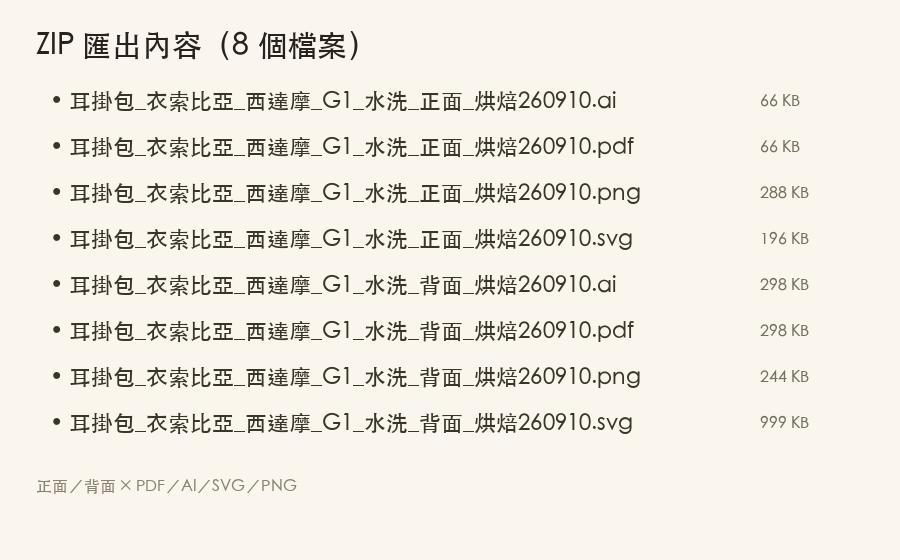

The whole generator is a pure static webpage. All the layout happens right in the browser — no server needed, and none of the data you enter gets sent anywhere.
The two beans on the covers are both ones Wide Living Cup is currently selling.
Check out Wide Living Cup's coffee beans and drip bags
Understand the Architecture First: You, Rules, Agents, Tools
Before you touch anything, spend five minutes understanding how the whole thing works. Once you get this section, every step after it will make a lot more sense.
Chat AI and an Agent: The Difference Is a Pair of Hands
Most people use AI by chatting with it on a webpage or a phone. You ask a question, it gives you an answer. Turning that answer into something real still means copying, pasting, and opening software yourself.
An agent works on your computer. It can open files in a folder, edit their contents, run commands in the terminal, run programs, notice when the result is wrong, go back and fix it, and run it again.
So what you hand the agent is a goal: what it should look like when it's done, and how you'll know it's finished. The agent works out the steps; you're the one who signs off.
The Four-Layer Architecture
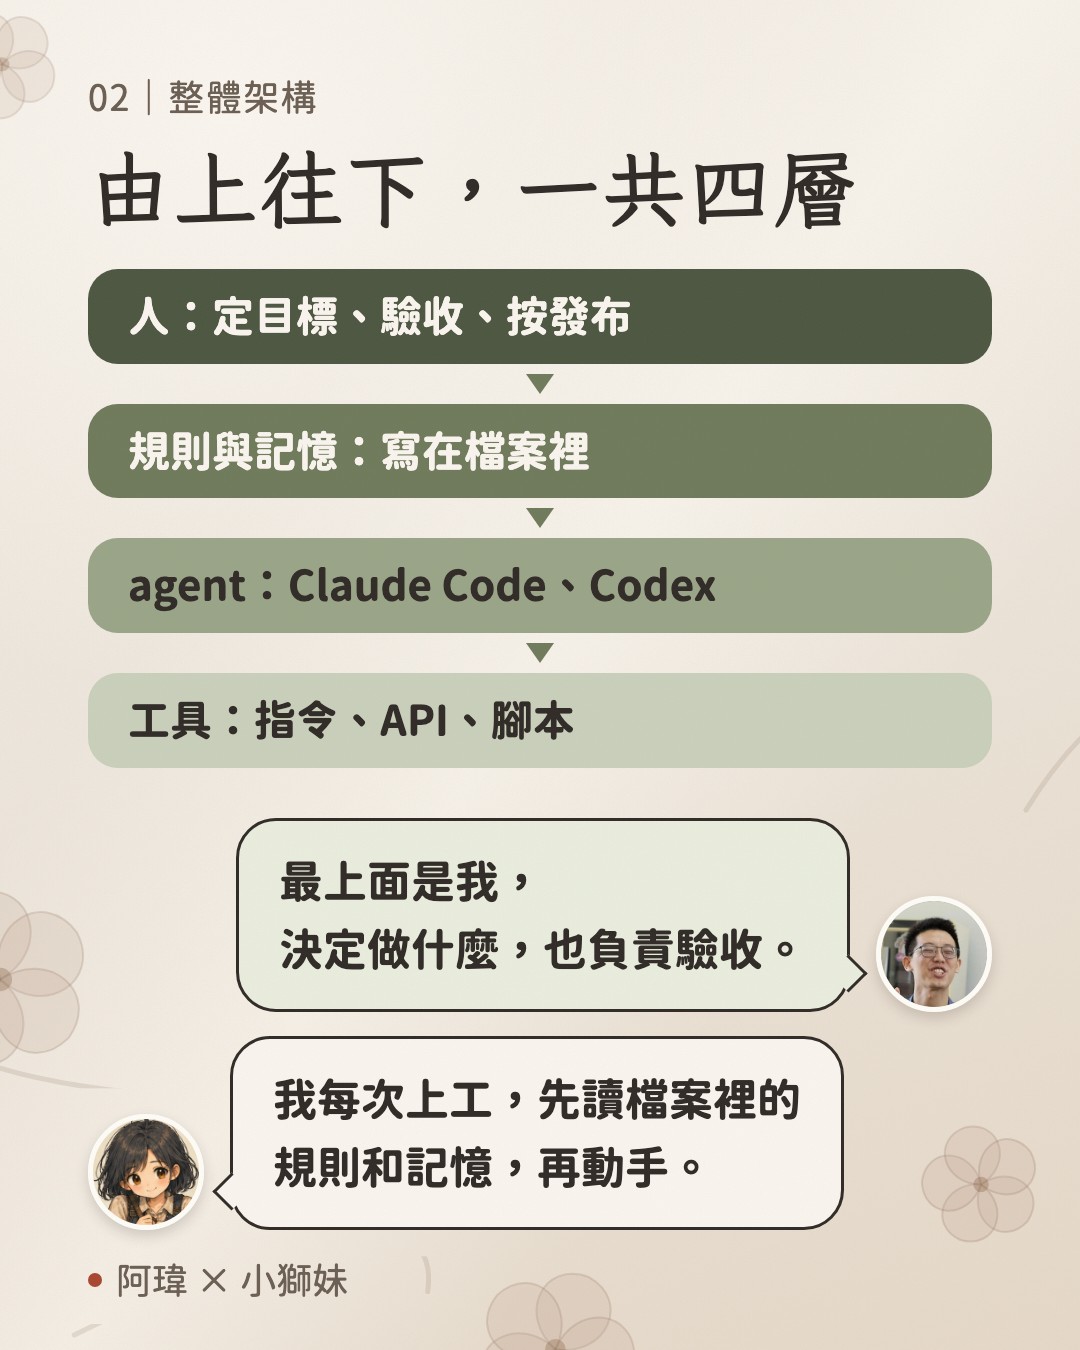
| Layer | What it is | Who's responsible |
|---|---|---|
| Person | Decides what to build, reviews it, hits publish | You |
| Rules & memory | The way of doing things, lessons learned, and progress, all written in files | You and the agent write it together |
| Agent | Claude Code, Codex | Reads the rules, plans, acts, self-checks |
| Tools | Commands, APIs, scripts | Called by the agent |
Of the four layers, the model is the one most likely to get swapped out — a new version comes out every few months. Rules and memory stay in your own folder, so switching models or tools doesn't break the continuity.
The layer worth investing your time in is the second one.
The Roles of Claude Code and Codex
Claude Code is Anthropic's agent, and Codex is OpenAI's agent. Both work in the terminal, their capabilities are close, and you can just pick one to get started.
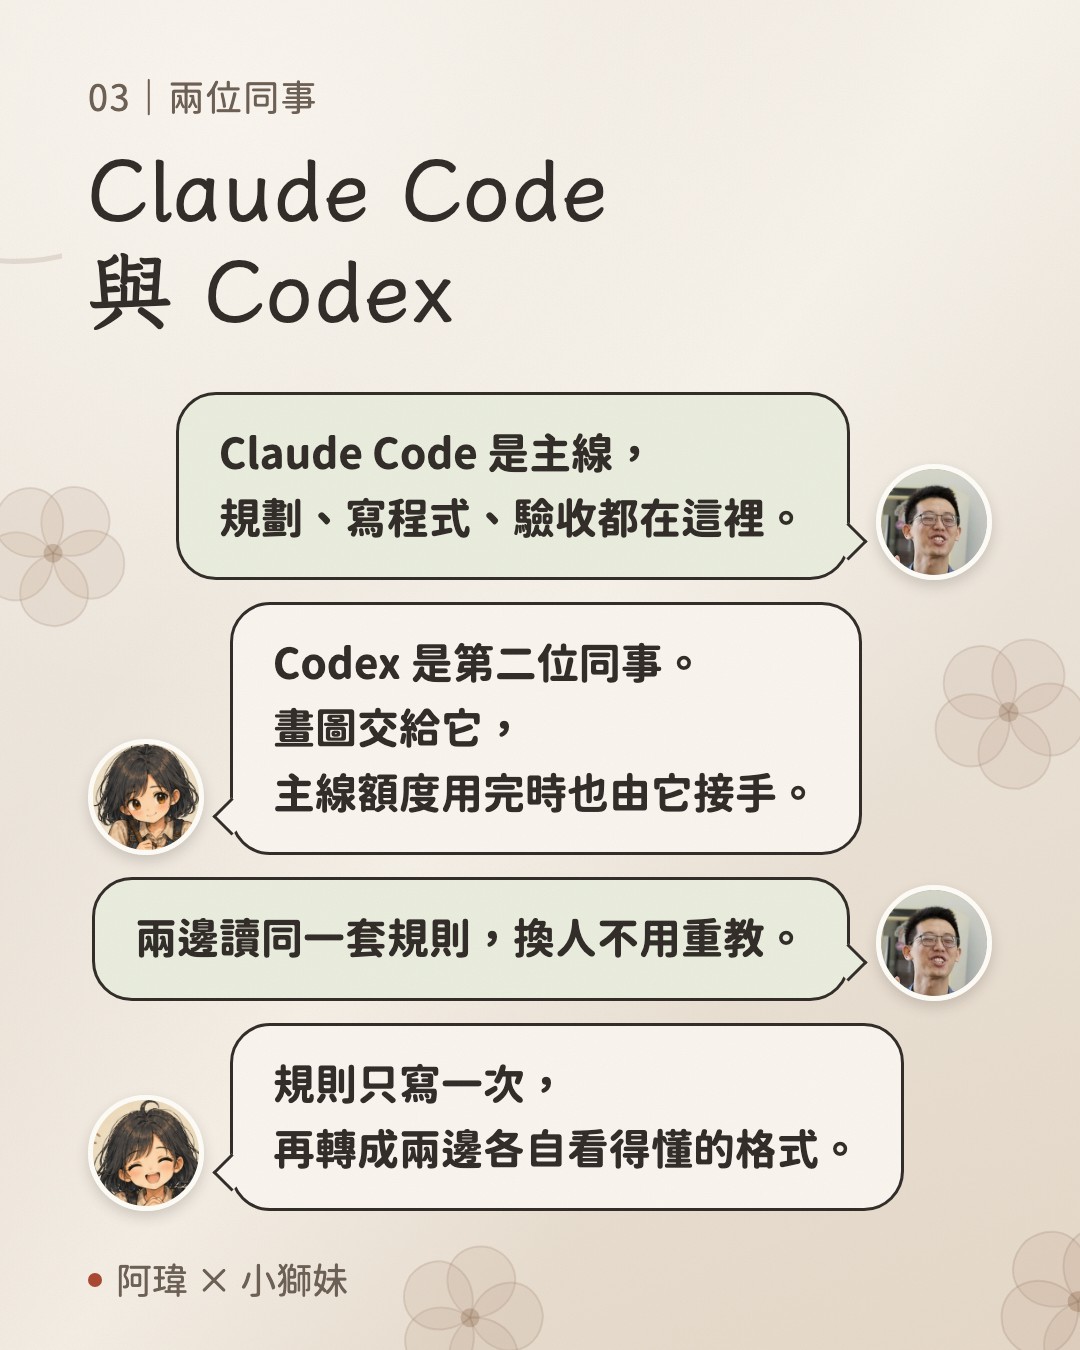
Here's how I split the work between them:
- Claude Code is the main line: requirements discussion, planning, coding, review, and deployment mostly happen here. It can dispatch several sub-agents to work in parallel, and it can lay out the whole plan for me to approve before it starts.
- Codex is the second teammate: it handles image generation (the illustrations in this article were drawn by Codex on Claude Code's orders), and it steps in when Claude Code's usage quota runs out.
The two tools read rules files with different names, but you can have them read the same content:
- Rules file:
CLAUDE.mdin the project folder - Skill location:
.claude/skills/<name>/SKILL.md - Hand off one task without opening a conversation:
claude -p "task description" - Have it read Codex's rules: write one line,
@AGENTS.md, inCLAUDE.md
- Rules file:
AGENTS.mdin the project folder - Skill location:
.agents/skills/<name>/SKILL.md - Hand off one task without opening a conversation:
codex exec "task description" - User-level global rules:
~/.codex/AGENTS.md
Setup: Preparing Your Work Environment
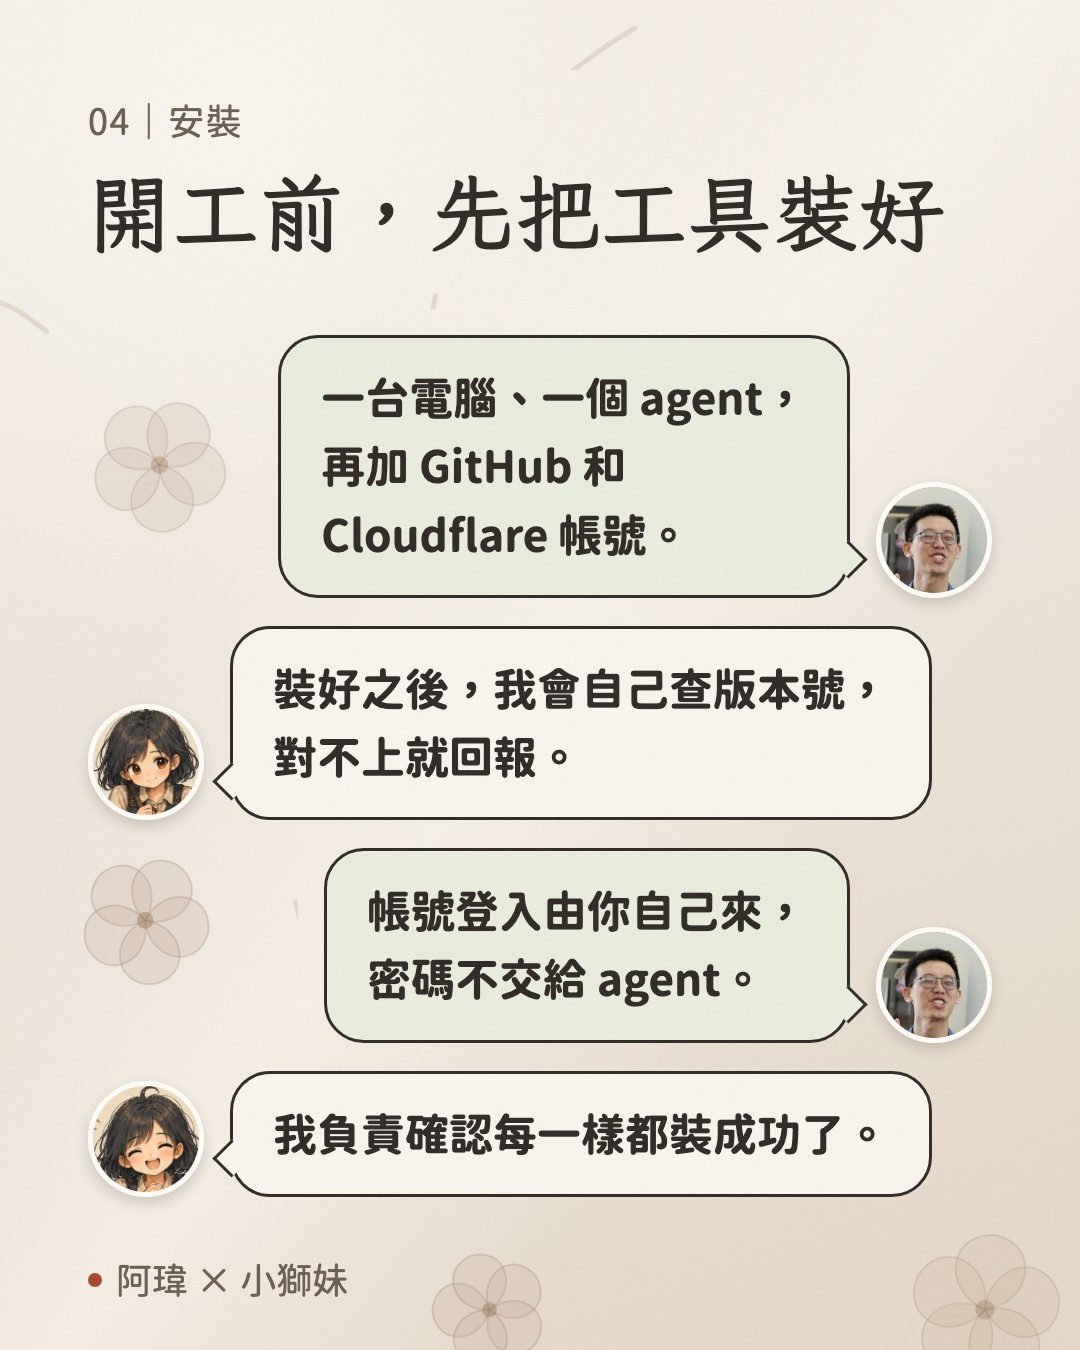
Here's what you'll need:
| Item | Purpose | Cost |
|---|---|---|
| A computer (macOS or Windows) | Where the agent works | — |
| A paid Claude or ChatGPT subscription (either one) | To use Claude Code or Codex | See the "Cost" section |
| Node.js | Needed for building and deploying the generator | Free |
| Git | Records every change, so you can roll back a broken edit | Free |
| A GitHub account | A safe place to store the code | Free plan allows private repositories |
| A Cloudflare account | To put the generator online | Free for static pages |
Step 1: Open the Terminal
Press Command + Space, type "Terminal," and press Enter.
Press the Start key, type "PowerShell," and click "Windows PowerShell."
Step 2: Install Node.js and Git
Node.js: Open the Node.js official download page, choose the LTS version (v24 as of September 2026), download the macOS installer (.pkg), and follow the on-screen steps.
Git: Type the following line in the terminal, then click "Install" in the dialog that pops up (Git is included with Apple's developer tools):
xcode-select --installNode.js: Open the Node.js official download page, choose the LTS version (v24 as of September 2026) and Windows, and follow the installation method the page provides.
Git: Download the Git for Windows installer from the official Git Windows page, or type the following in PowerShell:
winget install --id Git.Git -e --source wingetAfter installing, close the terminal and reopen it, then type the following three lines — if each one prints a version number, it worked:
node -v
npm -v
git --version
Step 3: Install an Agent
Pick one of the two. You can install both if you want.
You'll need the Claude Pro plan or above (the free plan doesn't include Claude Code).
curl -fsSL https://claude.ai/install.sh | bashirm https://claude.ai/install.ps1 | iexOnce installed, type claude in your project folder to launch it. The first time, it'll open a browser and ask you to log in.
Codex is included in every ChatGPT plan; paid plans just come with more quota.
curl -fsSL https://chatgpt.com/codex/install.sh | shpowershell -ExecutionPolicy ByPass -c "irm https://chatgpt.com/codex/install.ps1 | iex"Once installed, type codex in your project folder to launch it. The first time, it'll ask you to log in to your ChatGPT account.
Step 4: Sign Up for GitHub and Cloudflare
You sign up for and log into both of these accounts yourself, in the browser. Later, when the agent needs to deploy, it'll run a login command, a browser window will pop up with an authorization page, and you personally click to approve it. Your password never passes through the agent at any point.
Step 5: Let the Agent Check Everything for You
Open the agent and paste in the following:
Use read-only commands to check this computer's development environment — don't install or modify anything:
1. Operating system and version
2. The results of node -v, npm -v, and git --version
3. The current folder path
Put the results into a table. For anything missing, give me the official download page URL so I can install it myself.Setting Up the Workflow Skeleton
With the tools installed, it's time to give the agent a memory that carries over. It's all just folders and text files.

| File or folder | What goes in it | Why you need it |
|---|---|---|
AGENTS.md (plus CLAUDE.md) | Rules of engagement: language, spec-before-action, source verification, safety boundaries | The agent reads this first every time, keeping its behavior consistent |
memory/ | One file per lesson learned, e.g. "a bug in some package and its fix" | You never fall into the same hole twice |
records/ | Handoff notes: purpose, progress, next steps, decisions made | Lets you pick up right where you left off, across conversations, tools, or days |
.agents/skills/ | A process you've done two or three times with fixed steps, written up as a playbook | One sentence triggers it, and it runs through the steps |
In Practice: Building the Drip Bag Generator with an Agent

Get Grilled with Questions First, Then Write the Spec
The first thing I said to the agent was simple: "Help me build a generator for drip bag covers — swap the info for each batch of beans, and lock everything else in the layout."
It didn't start building right away. It asked questions in batches: What are the bag's actual dimensions? What printer or print shop, and what file format do they take? Which fields does the regulation require? Which data changes from batch to batch? What should deliberately be left out?
Once the questions were answered, it organized everything into a spec: the goal, what to build, what not to build, how to know it's done, and how to roll back if something goes wrong. I read it, said "approved," and only then did it start.
The places that needed the most rework were almost always the places that weren't spelled out clearly at the start. Those ten minutes of getting grilled with questions usually save several hours later on.
Three Fact-Checks Along the Way
Three things that came up during development say a lot about how an agent should work.

The Prompt Series
What follows is split into seven parts — paste one at a time. Once a part is done and you've personally confirmed it's fine, paste the next one. Every part has the agent show you its plan first; it only acts once you approve.
You are my AI workflow setup assistant. This part is interview only: don't create, modify, or delete any files, and don't install anything.

My background: I run a small coffee shop and roast my own beans. I want to build a "drip bag label generator": fill in the data for each batch of beans, and it produces front-and-back cover files ready to send straight to print, with the brand and regulatory fields fixed.

Interview me this way:
1. Ask one group of questions at a time (2-4 questions), with 2-4 options for each one to pick from. When you have a recommendation, put it first and explain why.
2. For anything you can check yourself with read-only commands (operating system, installed tools and versions), say what command you're going to run, then check it yourself — don't ask me.
3. Things to clarify:
   - Brand assets: logo file format, brand name and tagline, specified fonts and colors
   - The bag: finished dimensions (in millimeters), front and back, seal edges and safe margins
   - Data that changes per batch: bean name, origin, processing method, roast level, flavor notes, description, roast date, and anything else
   - Fixed data: required regulatory fields, contact info, where the QR code should link to
   - Printing: printing it yourself or sending it to a print shop, which file formats are needed, whether bleed and trim marks are needed
   - Who will use this generator, and on a computer or a phone
   - What to deliberately leave out
4. When the interview is done, put together a "requirements summary" (bulleted, under 500 words) for me to confirm. Don't move to the next step until I say it's confirmed.Set up the workflow skeleton in the current folder. First list the files you'll create along with a full draft of each file's content — only create them once I say "approved."
1. AGENTS.md (the master copy of rules shared by all agents), containing at least:
- Always reply in the language I'm using.
- Before editing files, installing software, or deleting files, explain what you're going to do, which files it affects, and how to undo it if something goes wrong, then wait for my approval.
- For prices, specs, regulations, and software features, always check official sources and cite the URL and the date checked; if you can't find it, say so.
- Anything that can be done with a command, a file, or official documentation shouldn't be done by clicking around on screen instead.
- Passwords, API keys, and login tokens never go into any file, and never ask me to paste them into the conversation.
- Deploying to production, sending a message to anyone, or deleting data — the final step is always executed by me or requires my explicit approval.
- After finishing something, actually verify it (run tests, open the file, measure the dimensions), and say clearly what you verified when reporting back.
- Write any problems found and their solutions into memory/, and update the memory/MEMORY.md index.
- If something is left half-done, pause and write a handoff note in records/.
2. CLAUDE.md: content is just one line, @AGENTS.md.
3. memory/MEMORY.md, and save the requirements summary from the previous part as memory/requirements.md.
4. records/README.md: the handoff note format (purpose, progress, next steps, files touched, decisions and reasoning).
5. An empty .agents/skills/ folder.
6. Initialize git, create a .gitignore (excluding node_modules, output files, and any .env or key files), and make the first commit.
When you're done, list the folder structure and confirm that CLAUDE.md contains only that one line.Read memory/requirements.md and write a spec document at docs/spec.md. This part is documentation only — no code.
The spec should include:
1. Layout: a layout diagram for both the front and back (a text description with coordinates is fine), all units in millimeters, marking the finished dimensions, bleed, safe margin, the position of every element, and the minimum font size.
2. A field table: for each field, whether it's "fixed" or "filled per batch," the character limit, and what happens when that limit is exceeded (shrink the font size, wrap the line, or prompt the user to shorten it).
3. Regulatory labeling: based on the products I sell, check Article 22 of the Act Governing Food Safety and Sanitation and the official guidance from the Ministry of Health and Welfare's Food and Drug Administration, and list what must be labeled on the packaging. Cite the official URL and the date checked for each item; for anything you're unsure applies, mark it "needs human confirmation" rather than deciding on your own.
4. Output formats: PDF (for printing — text converted to outlines, embedded at the correct size), AI (explain the relationship between a modern .ai file and PDF, with an official source), SVG, PNG (300dpi), and the filename convention for the ZIP package.
5. Technical choices: a pure static webpage (HTML, CSS, JavaScript, with all layout done in the browser — no server, no data uploaded), the libraries chosen and their licenses (fonts too — confirm the license allows embedding and commercial use).
6. Acceptance criteria: list 5-8 conditions that can actually be checked, e.g. "the longest bean name fits," "the PDF dimensions measure correctly," "the QR code scans on a phone."
7. What's deliberately left out.
Show it to me when it's done — don't start writing code until I approve it.Following docs/spec.md, build the first printable version. Scope is limited to this:
1. A web form: the fields filled in per batch, with an instant preview of the front and back as you fill them in.
2. A "Download PDF" button: one page each for front and back, matching the spec's dimensions, with text converted to outlines.
3. Fixed fields (brand, regulatory fine print) written as constants in the code, not editable from the form.
4. Write automated tests: at minimum, test that "the longest content at the field limit fits or triggers a prompt" and "the PDF page dimensions are correct."
When done:
- Run the tests and paste the results.
- Open it in a local preview and take a screenshot with sample data filled in, for me to see.
- Generate a sample PDF, tell me where the file is, and let me personally open it to check it and print a test copy.
- Make a git commit.
Don't move to the next part until I confirm the sample is good.Building on the confirmed minimum version, add one feature at a time. After each one, run the tests, show me a sample, and make a git commit:
1. Patterns: map the first flavor keyword to a set of decorative graphics (write the mapping as a separate config file, so it's easy to add more later). If a graphic is a raster image, convert it to vector, and check afterward that the node count hasn't exploded.
2. QR code: link to the URL specified in the spec, then print it out and actually scan it with a phone to confirm it works.
3. Date calculation: only the roast date is entered; the other dates are computed automatically per the spec's rules.
4. Multi-format export: AI, SVG, PNG (300dpi), all sharing the same layout output as the PDF — open each one and confirm the content matches.
5. ZIP packaging: download every format for both sides in one go, with filenames following the spec's rules.
6. Layout stress test: run through the data for every bean I currently sell (I'll provide the list) and list anything that doesn't fit or needs shortening.
When you hit an error, look for the cause in the official documentation, the package's source code, or its issues first, and write the cause and the fix into memory/ — don't guess your way around it.Deploy the generator to a URL so everyone at the shop can use it. Show me the plan first, and only proceed after I approve it.
1. Create a private repository on GitHub and push the project to it (when a login is needed, let me complete the authorization in the browser myself).
2. Deploy using Cloudflare Workers' static assets: check the official Cloudflare documentation and configure the wrangler config to upload only the files the page needs.
3. When running wrangler login, let me authorize it in the browser myself; before wrangler deploy, show me the list of files to be uploaded, and only run it once I say "deploy."
4. After deploying, actually open the URL with curl or a browser to confirm the page, fonts, and download function all work, and test it once on a phone too.
5. If I have my own domain, check the official documentation on binding a custom domain and walk me through it step by step.
6. Write the deployment method and any notes into memory/deploy.md.1. Write up "generating the cover for a new batch of beans" as a skill: .agents/skills/drip-label/SKILL.md. The YAML frontmatter at the top needs a name and a description; the description should say clearly when to use it, including phrases I might actually say (e.g. "generate the cover for new beans," "make the drip bag print files"). The body should cover the steps, how to verify it's done, and common issues. Show me a draft first.
If you're Claude Code: also create a link at .claude/skills/drip-label pointing to the master copy; if you can't create a link, copy the file instead and note the master copy's location on the first line.
2. (Only do this once both agents are installed) Have the other agent do a read-only review:
- If you're Claude Code: hand it off with codex exec; if you're Codex: hand it off with claude -p.
- What to hand off: "Read docs/spec.md, .agents/skills/drip-label/SKILL.md, and the code — read only, don't change anything. Check: whether every acceptance criterion has a corresponding test, whether every regulatory field cites an official source, and whether any password or key has been written into a file. List the problems as bullet points, each with the exact line quoted from the file."
- Show me the complete instructions before running it. Once you get the report back, decide which findings are valid, list your suggested fixes, and wait for my approval before making changes.Deployment: Putting the Generator Online
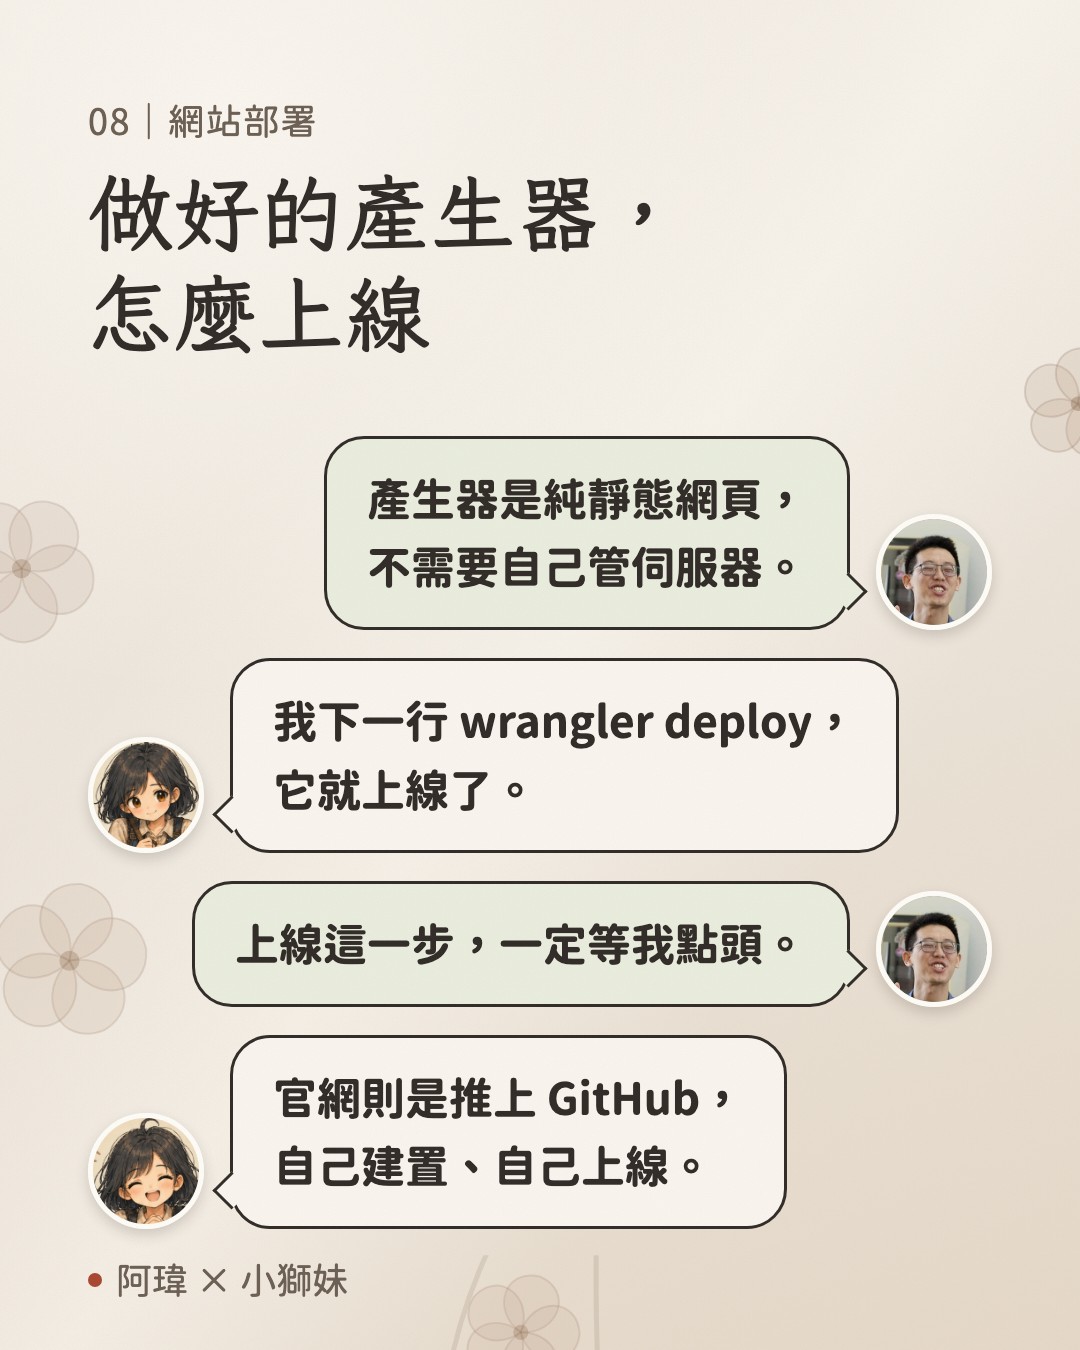
The generator is a pure static webpage: just HTML, CSS, JavaScript, plus font and pattern files, with all the computation happening in the user's browser. A page like this fits comfortably on Cloudflare Workers' static assets service, free plan included.
| Method | Process | Best for |
|---|---|---|
| Direct deploy | Run npx wrangler deploy in the project folder | A small tool maintained by one person, like this generator |
| GitHub auto-deploy | Push the code to GitHub, and Cloudflare builds and deploys it automatically | A site that updates often and needs a build history, like a main website |
The Core of Web Coding: Results-Oriented, Always Learning, Tracking Sources
AI "hallucinates" — it states things that don't exist with a completely straight face. That's an especially costly habit when you're making something that actually has to go to print.
I use three things to keep it in check:
- Results-oriented. Every goal I give the agent is a checkable result: it prints, the dimensions are right, the QR code scans, the regulatory fields are correct, it doesn't break on a phone. Sounding great but not actually working means it isn't done yet.
- When stuck, go learn. When it hits something it doesn't understand, I have the agent dig through official documentation, the package's source code, or the actual text of the regulation. That font-warping problem earlier only got solved by tracing all the way into the source code. Whatever it learns gets written into memory.
- Track sources. Every price, every regulation, everything a tool can or can't do comes with a source and a date checked. When it can't find something, it says so honestly.
Stack all three together, and the AI still gets things wrong sometimes — but whatever it gets wrong doesn't pass review.
Letting Agents Hand Off Work to Each Other from the Command Line

Claude Code's claude -p and Codex's codex exec both let you run one line in the terminal, hand off a task, and it's done when the command finishes.
That means one agent can put another agent to work:
- Image generation: The Xiaoshimei illustration on this article's first card was made by Claude Code writing the scene requirements, character appearance description, and features to avoid into a prompt file, handing it to Codex with
codex execto draw. Once drawn, it gets saved to a folder, and Claude Code opens it up and checks the character against the reference, point by point. - Cross-review: whatever spec or code one side writes gets handed to the other for a read-only check. Models trained by two different companies don't necessarily share the same blind spots, which makes this a cheap second layer of checking.
A Few Things I Learned About Efficiency

- Save the expensive model for where it counts. The strongest, most expensive model handles planning and review; high-volume work with a clear spec gets dispatched to a cheaper model, running in parallel.
- What makes a long conversation expensive is re-reading it. Every time an agent replies, it re-reads the entire conversation up to that point. Even though the re-read portion gets a caching discount, each turn still gets pricier as the conversation grows, and details from earlier get easier to forget the further along it gets. Once something's done, write a handoff note and start a new conversation.
- If a command can do it, don't look at the screen. An agent can operate a browser and click buttons, but that's the slowest, most error-prone way to do things. Whatever can be done with a command, an API, or a URL parameter, use that first.
- Self-checks don't count. One time I asked a sub-agent to blur out faces in a batch of screenshots. It reported everything done, and when I opened each one myself, four had been missed. Since then, one more rule got added: review is always done in person, and anything involving personal data, money, or something going out to other people gets checked in full, never spot-checked.
Security Boundaries

- Passwords, API keys, login tokens: never pasted into a conversation, never written into a file, never pushed to GitHub. Logins are always done in person, in the browser.
- Actions that reach out into the world (a site going live, a message to a customer, deleting data): the agent gets everything ready and shows you a preview, but the final step is executed or explicitly approved by you.
- Customer names, phone numbers, addresses: never written into the rules, memory, or handoff notes.
- Commit with git before every major change, so a broken edit can be rolled back.
Cost
Both companies run monthly subscriptions, with usage caps measured in "per five hours" and "per week" allowances, varying by plan.
| Plan | Monthly fee (USD) | Claude Code |
|---|---|---|
| Free | 0 | Not included |
| Pro | $20 billed monthly; averages $17/month billed annually | Included |
| Max | From $100 (5x or 20x Pro's usage) | Included |
| Plan | Monthly fee (USD) | Codex |
|---|---|---|
| Free | 0 | Included, lower quota |
| Plus | 20 (Taiwan's pricing page shows NT$690) | Included |
| Pro | 100 or 200 (the $200 tier has been closed to new sign-ups since September 10, 2026) | Included |
On the deployment side: private GitHub repositories are free; Cloudflare Workers static file requests are free with no limit, and the free tier for GitHub-linked auto-builds is 3,000 minutes per month.
Q&A
Getting Started
Q: I can't code at all — can I still build this?
Yes. Your job is to explain the requirements clearly, look at the samples, test-print them, and judge whether they're right — the agent writes the code. What actually takes practice is "delegating": stating the goal, the constraints, and the acceptance criteria clearly.
Q: About how long does the first version take?
It depends on how much you need. I'd suggest following the prompt series in order: get to the minimum version — "fill in the form → download the PDF → print a test copy" — confirm it prints, and then add features one at a time. Asking for every feature at once is the surest way to get stuck.
Q: Can I do this on just a phone?
Not recommended. The agent needs to install tools, read and write files, and run tests on a computer. The finished generator can be designed to work on a phone too, but do the development on a computer.
Cost and Tools
Q: Which should I pick, Claude Code or Codex?
Their capabilities are close, so just pick one to start. If you already have a ChatGPT subscription, you can try Codex without paying anything extra; Claude Code needs the Claude Pro plan or above. Install both later, and you can have them hand off tasks and review each other's work, switching to the other one whenever one runs out of quota.
Q: How much does the whole thing cost?
Mostly the AI subscription: Claude Pro or ChatGPT Plus, around $20 a month. GitHub private repositories and Cloudflare static page deployment both fall within the free plan for a typical small shop's usage. If you want to bind your own domain, that's an extra annual domain fee.
Q: What happens when the quota runs out?
Both companies' quotas reset every five hours and every week. When you run out, you can wait for the reset, upgrade your plan, or switch to the other agent and keep going — since the rules and progress are all written into files, switching hands picks up right where you left off.
Printing
Q: What file format does a print shop take?
Ask your print shop first. Most take PDF (text converted to outlines, correct dimensions, bleed added when needed); shops used to Illustrator will want AI. The generator outputs PDF, AI, SVG, and PNG all at once, specifically so you don't have to convert files every time.
Q: What if my home printer can't print full-bleed?
Check your printer manufacturer's documentation first. Both Epson's and Canon's official documentation explain that borderless printing only supports certain paper sizes and materials, and it slightly enlarges the image and crops off whatever runs past the edge of the paper. If your machine doesn't support it, lay the cover out on a larger sheet with bleed and trim marks on all four sides instead, and trim it after printing. This is, itself, a perfect first exercise to hand your agent.
Q: What fields does a drip bag's packaging need to show?
Taking Taiwan as an example, Article 22 of the Act Governing Food Safety and Sanitation lists what packaged food must label, including the product name, ingredient names, net weight, food additives, the manufacturer's name/phone/address, country of origin, expiration date, and nutrition labeling, among others. Per an FDA announcement, coffee meant for brewing that contains no other ingredients or additives is exempt from nutrition labeling when there's no nutrition claim. The size of the labeling text is separately specified in the Enforcement Rules of the Act Governing Food Safety and Sanitation. Whether these apply to your product should follow the competent authority's latest announcements — contact your local health bureau directly if needed.
Security and Maintenance
Q: What if I break something?
Part 2 of the prompt series already has git tracking versions, with a commit made after every feature added. If something breaks, ask the agent to list recent commits and roll back to the last working version.
Q: Could customer data leak?
The generator built this way is a pure static webpage — all the layout happens in the user's browser, and nothing you fill in gets sent to a server. On top of that, the rules file already requires that passwords, keys, and customer data never be written into a file. Handling orders and customer data would need a login and a database, which is a system of a different scale, and would need its own security planning.
Q: How do I add features later?
Tell the agent what you want to add, and it'll read the rules, memory, and spec first, then follow the same process — clarify first, write a spec, get your approval, build it, review it. Before changing the layout, have it run a layout check against every bean you sell, to confirm nothing fails to fit.
One Last Thing
While writing this, I kept picturing a morning at my friend's shop: a fresh batch of beans just off the roaster, he opens the generator, fills in the bean name and roast date, clicks once, and the cover lays itself out. Whatever hour that saves him, he can spend it test-roasting a new bean, or just sitting down to actually enjoy a cup of coffee.
A tool exists to give people their time back.
If you'd like to try the two beans on the cover for yourself, come visit Wide Living Cup.
Pick your beans at Wide Living Cup
Written by Awei, September 2026
Along the way, Tao Yun-Chih's publicly shared AI First concept helped me enormously. His Knowledge Satellite course "AI First Action", his new book "The AI First Self-Upgrade Revolution", and his personal website saved me from a lot of wasted effort building this whole approach from scratch. My sincere thanks.
This article also owes heartfelt thanks to Wide Living Cup's dear friend and fellow shop owner, C2C Erzhang.
References (25 sources, verified September 15, 2026)
- Claude plans and pricing
- Claude Code installation
- Claude Code memory files and @ imports
- Claude Code skills
- Claude Code CLI reference
- Anthropic prompt caching pricing
- Codex included in ChatGPT plans
- ChatGPT Pro tiers
- ChatGPT pricing
- Codex CLI and codex exec
- Codex skills
- Codex AGENTS.md
- Node.js download
- Git installation (macOS)
- Git installation (Windows)
- Creating a GitHub account
- Wrangler installation
- Workers static assets
- Workers custom domains
- Cloudflare Workers pricing
- Workers Builds limits
- GitHub plans
- Act Governing Food Safety and Sanitation, Article 22
- Enforcement Rules of the Act Governing Food Safety and Sanitation
- Regulations Governing the Determination of Origin for Imported Goods, Article 7